If you encounter leaks, unusual odors, damaged tanks, missing gauges, or any sign of contamination, stop and contact qualified electrical and environmental professionals and your authority having jurisdiction. Follow current manufacturer instructions and do not perform energized testing, venting, or removal yourself.
What this guide covers and what it does not
This guide explains how to recognize visual and nameplate signals that commonly identify older air‑magnetic, oil‑filled, and SF6 circuit breakers so you can document equipment for a purchase review or for internal records. Use the cues here to assemble clear photos and basic descriptive fields before submitting items for consideration.
This page is only for identification and documentation. It does not advise how to remove, transport, test, service, or dispose of equipment. If you encounter signs of leakage, pressure loss, contamination, or unknown gas or fluids, stop and engage appropriately qualified electrical and environmental professionals and the authority having jurisdiction for your site.
- Purpose: identification, documentation, escalation triggers
- Not included: energized testing, removal, disposal steps
- Qualifying equipment may be submitted for purchase review
Visual cues: how air‑magnetic, oil, and SF6 breakers often differ
Air‑magnetic breakers typically have a compact interrupter assembly with external mechanical components, such as operating linkages and arc chutes, often visible behind protective panels. They generally lack large external fluid tanks. Oil‑filled breakers usually present an oil conservator or tank, oil sight glass or gauge, and tank hardware such as drain or sampling points.
These are tendencies, not rules. Enclosures, retrofits, and substation layouts can alter appearance. When documenting an item, rely on fixed markings and plates rather than assumptions from a quick visual impression. Do not open sealed compartments or attempt pressure checks—photograph only accessible exterior features.
- Air‑magnetic: visible arc chutes, compact interrupter housings, no oil tanks
- Oil: external conservator/tank, sight glass, drain/sampling plugs or hardware
- SF6: pressure gauge/indicator, gas fittings/valves, sealed gas compartments
Exact identification fields to record from nameplates and tags
Capture every readable line on the factory nameplate and any removal or site tags. Helpful fields include manufacturer, catalog or type number, part number, serial number, rated voltage (kV), rated continuous current (A), interrupting rating (kA), frame or mounting size, trip unit type, and any text referencing the interrupting medium (oil, SF6, air, puffer). If multiple plates exist, photograph each and transcribe the text carefully.
Record removal metadata when present: date removed, removal tag or work order number, location in the facility, and the name of the person or contractor noted on the tag. These details support environmental assessment and OEM lineage research. Do not remove factory plates; photograph them in place from multiple angles for legible records.
- Manufacturer, model/catalog, part number, serial number
- Rated voltage (kV), rated current (A), interrupting rating (kA)
- Any wording identifying the medium: oil, SF6, vacuum, air‑magnetic, puffer
- Removal tag ID, removal date, site location
Original label and photo examples — what to photograph
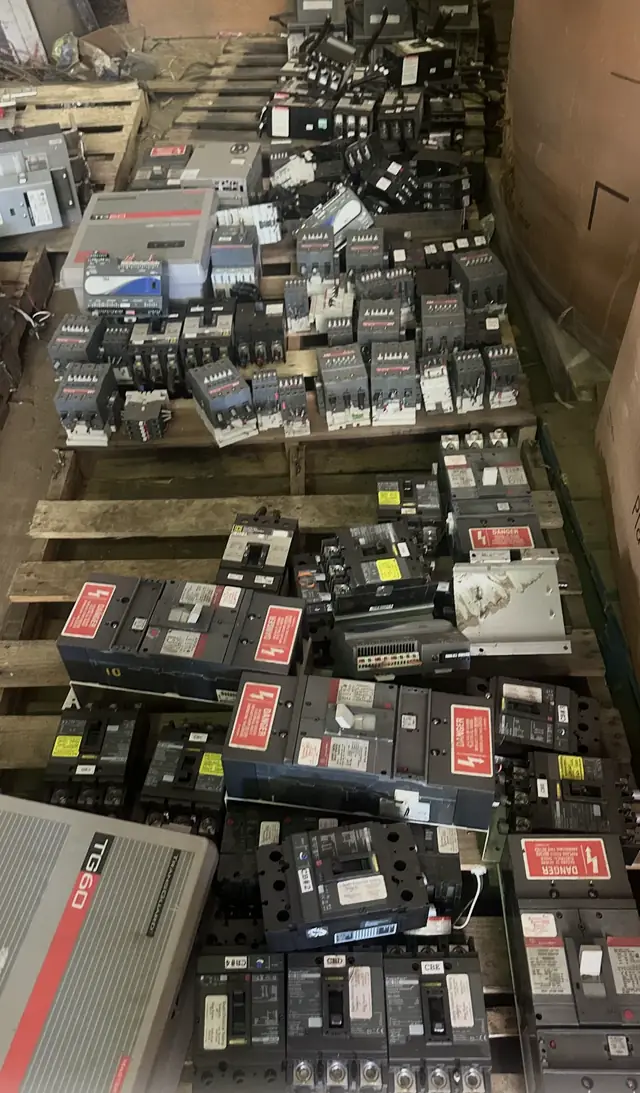
Good photographic evidence speeds any review. Aim for: a head‑on photo of the primary nameplate, a close shot to capture small stamped characters, a full‑equipment view showing tanks or fittings, and context images showing adjacent gear and cable terminations. If a separate removal label or tag exists, photograph that tag next to the breaker nameplate.
Keep photos clear and well lit. Include a ruler or reference card for scale if characters are small. Do not remove covers or access sealed compartments to photograph internal components. If a plate is corroded or painted over, document the condition and any readable portions—avoid tools or chemicals that could damage the plate or the equipment.
- Head‑on nameplate, close‑up nameplate, and full‑equipment views
- Images of any conservator/sight glass, pressure indicator, or valve fitting
- Photo of the removal tag placed beside the nameplate
OEM history and legacy naming conventions to watch for
Older equipment often uses legacy terms and abbreviated codes. Look for wording such as oil, minimum‑oil, oil‑immersed, air‑magnetic, puffer, and SF6 or sulfur hexafluoride. Some manufacturers used product family names or type codes that may not appear in current catalogs; recording the exact stamped text helps link a unit to historic datasheets or literature.
Manufacturer names and logos are useful identifiers only and do not imply current manufacturer support or suitability. When assembling documentation, capture any visible brand name, logo, or type plate code exactly as printed or stamped. That raw text helps a qualified reviewer trace OEM lineage without assuming parts availability or retrofit compatibility.
- Common legacy terms: oil, minimum‑oil, oil‑immersed, air‑magnetic, puffer, SF6
- Record exact stamped codes and type names — do not paraphrase
- Brand names are identifiers, not statements of support or compatibility
Honest condition descriptions and red flags
Use plain, objective descriptions such as: nameplate intact but partially obscured by paint; external oil tank present with visible corrosion; pressure indicator missing or unreadable; enclosure dented; mounting hardware incomplete. Avoid assertions about internal condition or performance unless supported by qualified test reports from appropriate professionals.
Stop and escalate if you observe red flags: active oil leakage, soaked insulation, visible oil pooling, oily odor, damaged or missing pressure indicators on SF6 compartments, bulging or deformed tanks, signs of overheating, or evidence of contamination. These conditions can pose environmental, safety, and handling concerns. Do not attempt to stabilize, modify, or test the equipment.
- Objective phrases: intact, corroded, painted‑over, missing gauge, leak staining
- Red flags: active leaks, pooling, damaged gas fittings or missing indicators
- If red flags are present, cease handling and contact qualified professionals
Environmental escalation checklist for oil and SF6 observations
If your inspection suggests oil or SF6 presence, pause further handling. Without opening equipment, photograph the condition, including any sight glass, indicator, or labeling that references fluids or gases. Notify your site’s environmental compliance contact and electrical safety leadership with the photos, nameplate details, and the date and location of the observation.
Do not vent, puncture, drain, refill, or pressurize any component. Those activities require trained personnel and approved procedures. When preparing documentation for a purchase review or internal records, include any available manifests, lab results, or contractor reports describing work already performed. These records reduce uncertainty but do not replace on‑site professional evaluation.
- Immediate steps: stop handling, document with photos, notify site contacts
- Provide nameplate images, removal tag details, date, and location
- Do not vent, drain, or pressurize — use appropriately qualified contractors
How to organize lots and what to include in a submission
Group similar items into logical lots (same model/type, removal date, or site area) and assign each breaker a unique lot or tag number that appears in every photo and in your inventory. A concise spreadsheet helps reviewers: include fields for lot/tag ID, manufacturer, model, serial, rated voltage, medium (oil/SF6/air), visible condition notes, removal date, and filenames of associated photos.
Make it easy to match records to photos. Include a cover photo of the lot showing all units with tags visible. If items have differing environmental flags (for example, one leaking oil while others appear dry), separate those into distinct lots and note the discrepancy. Submission of qualifying equipment is for conditional purchase review only and does not evaluate reuse, transport, or disposal.
- Spreadsheet fields: lot ID, manufacturer, model, serial, kV, medium, removal date
- One cover photo per lot plus individual nameplate and condition photos
- Separate items with environmental flags into distinct lots